Self-Managed GitLab
Torque supports connecting to self-managed GitLab repositories, allowing you to discover and manage assets stored in your on-premises GitLab instance. Communication with the server happens through a Torque agent installed on your network, as described in Using Self-Managed source control providers.
Prerequisites
- Agent: a Torque agent connected to the space, with network access to your self-managed GitLab instance.
- Access token: a GitLab personal access token with the following permission scopes:
apiread_apiread_repository
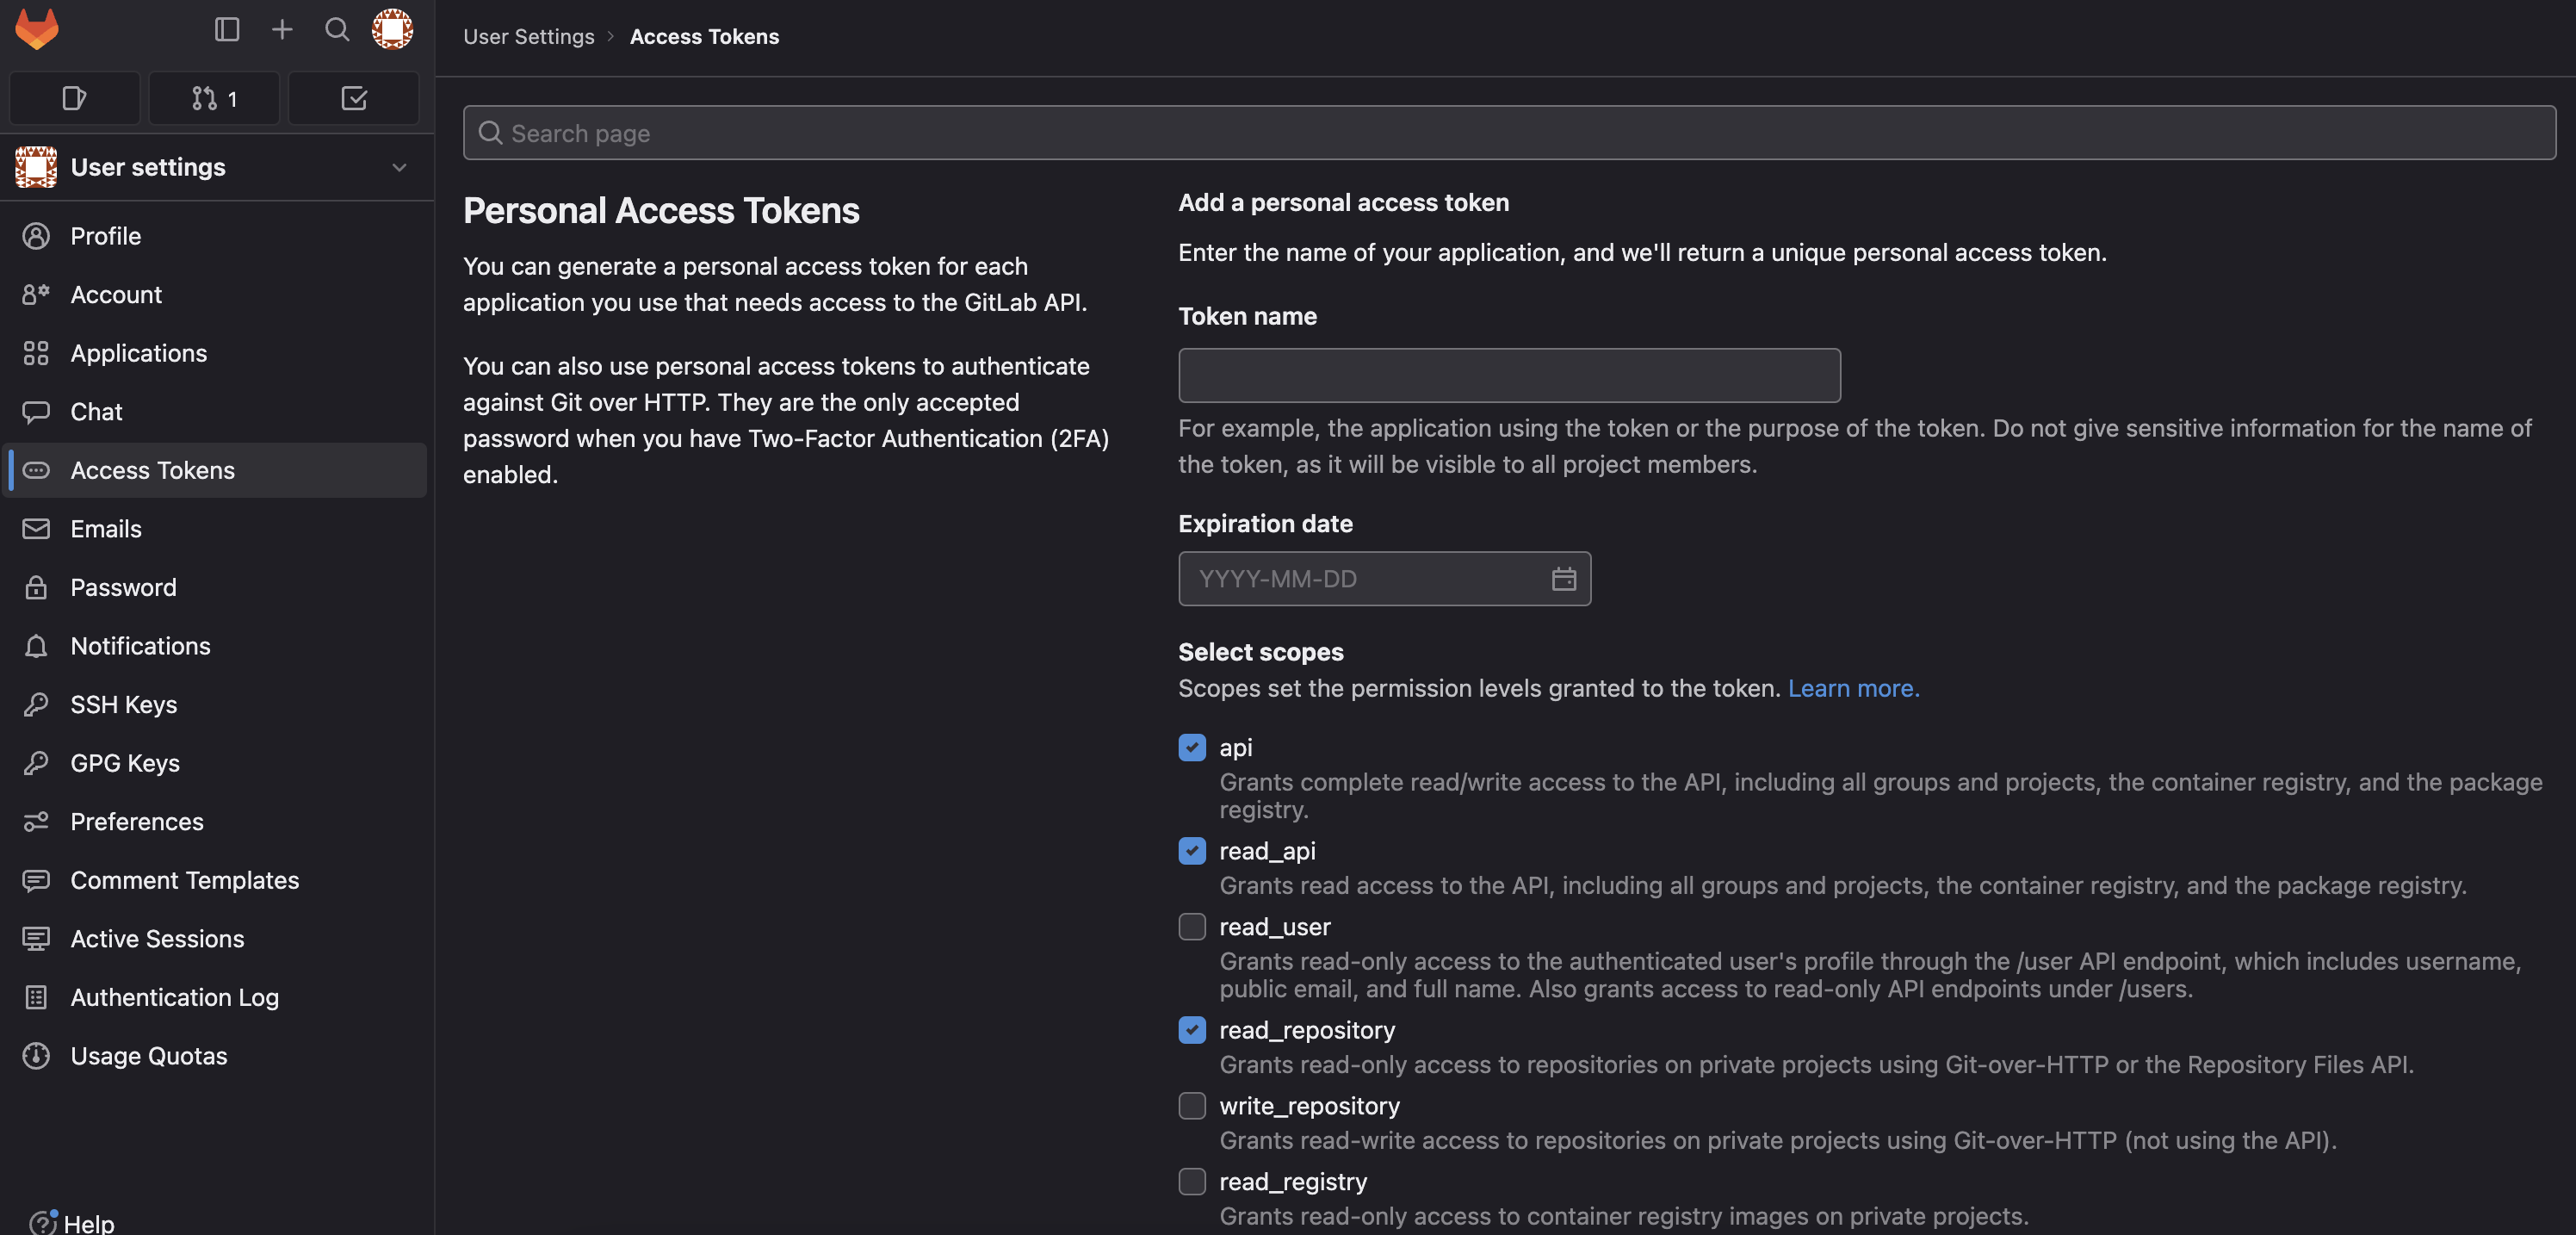
Configuration
- Select the space in the space selection dropdown, go to Automation > Repositories, and click Add Repository.
- In the Select a Repository Provider step, select GitLab and click Next.
- In the Connection step, fill in the Details: the Repository URL on your GitLab server, a Repository Name, and optionally a Branch.
- Select Self Managed Repository.
- Under Credentials, enter a Credentials Name (or pick existing credentials from the store) and the Personal Access Token (and the matching Access Token Type).
- Under Available Agents, select the agent (or agents) that can reach your GitLab server, or turn on All Agents.
- Click Test Connection to verify that the agent can reach the repository, then click Connect.
- Once connected, Torque discovers the assets in the repository. For more information on asset discovery, refer to Discover Your Assets.
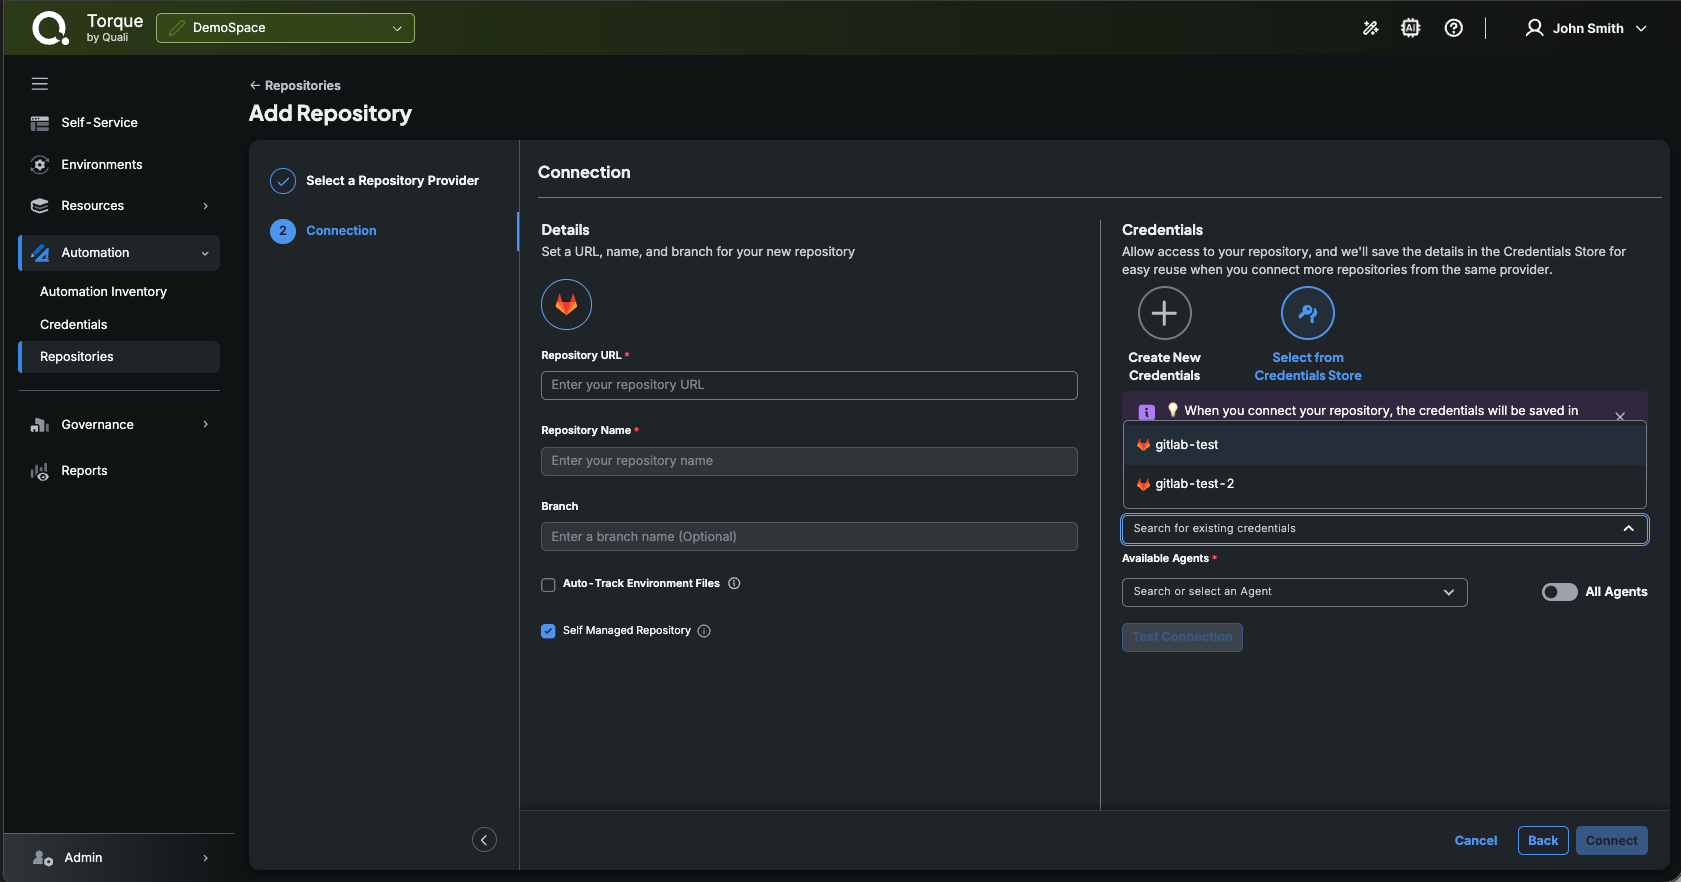
With a self-managed GitLab repository configured in Torque, you can seamlessly manage and version control your assets stored in your on-premises GitLab instance.